Free QR Code Generator
Design a QR code that looks like your brand, not a barcode. Pick what the code should open, then shape every part of it: body patterns, corner shapes, colors and gradients, a logo in the center, a caption, or a full designer frame. The live preview checks scannability as you edit, and the finished code downloads in PNG, SVG, WEBP or PDF.
Choose QR Code type
The preview updates as you go. You can style the code before or after entering the address.
Customize QR for Website, URL
Add logo
Drag and Drop file here or Choose file
Choose file
Add text
Body Patterns
Border
Corners style
Inner dots style
Background
Designer frames
A frame also restyles the code to match. You can fine-tune everything on the Style tab after.
Plain frames
Simple ready-to-print frames. Some carry a text line you can make your own.
Your QR preview:
Your text here
Nothing to scan yet
Add your link to activate the code.
How to create a custom QR code
The editor above is the entire tool: nothing to install, no account to make. Here is how a first code usually comes together, in the same order the controls appear.
Pick a type and add the destination
Choose what the code should open: a website, a social profile, a PDF or menu file, or Wi-Fi access. Paste the link or upload the file, and the preview on the right comes alive as a real, working code. Wi-Fi is the odd one out: it does not open a page, it hands the network name and password straight to the camera, so a phone connects on the spot.


Add a logo and a caption
The editor opens on the Logo & Text tab. Drop your own image into the center of the code - JPG, PNG, SVG or WEBP up to 30 MB - or pick one of the ready icons for Instagram, YouTube, WhatsApp and other popular apps. The moment a logo lands, the editor switches error correction to its highest level behind the scenes, so the modules the picture covers stay recoverable, and a size slider lets you decide how bold it should be.
Add text puts a short caption under the code - SCAN ME or anything you type - with its own color, font, size and weight controls.

Shape the body on the Style tab
This is where the code stops looking generic, one block at a time: Body Patterns reshapes the modules, Border draws a line around the code with its own thickness and style, Corners style and Inner dots style redraw the three finder squares, and Background sets a solid, gradient or transparent backdrop. Every part takes a color or a gradient of its own, and the preview repaints on every click, so experimenting costs nothing.


Wrap it in a frame
The Frames tab dresses the result up: designer frames restyle the whole code to match their art, plain frames are clean print-ready shapes, and many of them carry a text line you can rewrite. A frame never grows the code's own footprint, and anything a frame changes can be fine-tuned afterwards on the Style tab.


Check the verdict and create the code
The badge under the preview runs a live scannability check: green scans well, amber says test a print first, red asks you to ease off. When it reads green, pick a format - PNG or WEBP for screens, SVG or PDF for print - choose a resolution, and press Create QR code.

Download the files or send them to your inbox
The moment the code is created, a download window opens right over the editor with the exact image your files are made from. Grab the formats you picked - two or more arrive as a single archive - or expand Get it by email and the files land in your inbox. Close the window and keep editing; the button stays as Download until you change the design.

Make it yours, keep it scannable
Every option in the editor above is safe to explore, but a few physics rules decide whether a phone camera locks on in half a second or refuses to see the code at all. These are the rules our live checker tests against, and how to stay inside them.
Keep the code darker than its background
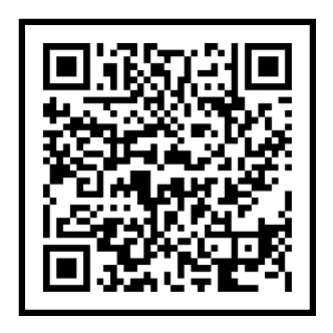
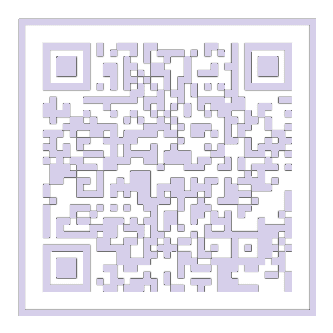
Scanners read a QR code by separating dark modules from light ones, and they expect the dark part to be the code itself. Black on white is the gold standard; deep purple or navy on a pale tint works almost as well. Cameras start to struggle with light gray, pastel tones, or an inverted code on a dark tile. If a color combo washes out, the checker under the preview flags it before you ever print.
Leave the margin alone
The white area around the code, called the quiet zone, is what a scanner uses to find where the code begins. The rule of thumb is a margin at least four modules wide on every side. This editor bakes a quiet zone into every download automatically; the only ways to lose it are cropping the file afterwards or placing a transparent-background version on top of busy artwork.


A logo spends the code's error budget
QR codes carry spare data for damage recovery: up to roughly 30 percent of the code can be missing and it still scans. A center logo spends exactly that budget. When you add one here, the editor quietly raises error correction to its highest level and keeps the suggested logo size within the safe range. Nudging the size slider is fine; maxing it out on a code you plan to print small is how codes stop scanning.
Match the print size to the scanning distance
A code that scans perfectly from a business card can be invisible on a wall. The working rule: print the code at least one tenth as wide as the distance it will be scanned from.
| Placement | Minimum size |
|---|---|
| In hand: business card, menu, packaging | 2.5 cm / 1 in |
| Counter or shelf: table tent, price tag | 10 cm / 4 in |
| Wall poster across a room | 30 cm / 12 in |
| Banner or storefront | 1 m / 3.3 ft |
Test before the print run
The badge under the preview runs a live check on contrast, logo coverage and pattern choices while you edit, and shows one of these three verdicts. Treat it as an early warning, not a guarantee: screens and paper behave differently. Before you print five hundred flyers, print one, and scan it with the oldest phone you can find, in bad light, from a bit too far away. If that one scans, the rest will.
Anatomy of a QR code
Every piece of a QR code has a job. Tap the numbered points to see what each zone does - and what that means when you restyle it in the editor.
Finder patterns
The three large squares in the corners are finder patterns. A scanner hunts for their unique 1:1:3:1:1 rhythm of dark and light, which reads the same from any direction - that is how a camera spots the code and works out its rotation within milliseconds. The editor above lets you reshape and recolor them (Corners style), and the live checker makes sure they stay recognizable.
Timing pattern
The dotted line of strictly alternating modules running between the finder squares - one row and one column - is the timing pattern. It tells the scanner how many modules the code holds and keeps the grid honest when the print is slightly stretched or photographed at an angle.
Alignment pattern
The small square near the bottom-right corner is an alignment pattern. It anchors the grid when the surface bends - a bottle, a sleeve, a curved sticker. This code carries one; larger codes add more of them across the area, which is how even huge codes survive curves.
Format information
The thin strips of modules hugging the finder squares store format information: the error correction level and the mask pattern the code was built with. The record is written twice in two different places, so a scratch across one copy does not take the whole code down.
Data modules
Everything else is data: your link or Wi-Fi credentials, interleaved with Reed-Solomon error correction codewords. The payload zigzags through the grid in two-module columns from the bottom-right corner. This is also the area a center logo eats into - and exactly why the editor raises error correction the moment you add one.
Quiet zone
The empty margin around the code is the quiet zone: at least four modules of nothing on every side. It is what lets a scanner separate the code from the page around it. The editor bakes it into every download - the scannability section above explains why it should never be cropped away.